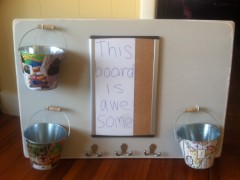
Gonna pat myself on the back. I made this!
I was window shopping on Etsy when I spotted an awesome mail organizer. It had everything we needed to stay organized – a state of bliss for me. Only problem was, the price tag was $220. OUCH!
Here’s how I made a very similar shabby chic mail organizer for just $36, saving myself a whopping $183.

Sanded corners and edges for a worn in look, with one coat of prime…
1. I kept returning to the Etsy listing for the $220 mail organizer. What made it so complicated that it was worth $220? During an email exchange with the maker, he sent me a picture of an unfinished mail organizer. Something clicked. He was painting particle board, sanding off some of the top paint layer to achieve a rustic look, affixing a few wood boxes, and slapping on a big ol’ price tag.
2. As long as I could conquer my fear of using our electric drill, I knew I could make a very similar mail organizer in the shabby chic style. I scoped out a piece of scrap plywood in the basement that was very close to the size I wanted. Hubs made one cut so it was perfect. (I haven’t conquered my fear of the jigsaw.)
3. I set up our two sawhorses in the backyard and sanded the front, edges, and sides. I rounded the corners and edges heavily to give the wood a used look. Using our electric sander, it took me about 20 minutes.

After two coats of Decorator White and finally two coats of Revere Pewter…
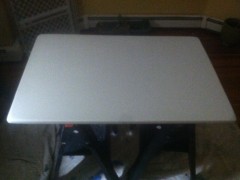
4. I painted on a coat of prime, followed by two coats of Decorator White, and finally two coats of Revere Pewter. (To save time, I wrap the wet, paint-covered brush tightly in plastic wrap, then stick it in the fridge. Obviously, this only works when the next coat is the same as what’s on the brush!) My board dried for at least two hours in between coats. I used paint we had sitting around the basement to lower my costs, and I wanted neutral colors so gray on white was perfect!

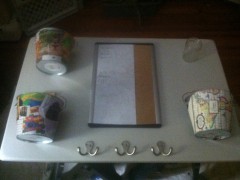
Laid out my items before drilling…
5. To achieve a shabby chic look, I found this blog especially helpful. When my final coat of paint was dry, I sanded the four corners so the wood showed through, and lightly sanded the edges and front so a little bit of white peeked through.
6. Finally, I laid out my three mail buckets (which I covered with mag cutouts and glued with ModPodge), my three double hooks, and a dry erase board that I had scavenged from my office. I drilled holes for the screws that would fasten the hooks and the mail buckets, then used velcro-tape fasteners to secure the dry erase board. All that is left is securing a small mason jar to the upper right corner that will hold dry erase pens.
How much money did I save?
FREE plywood board from basement
FREE white and gray paint from basement
FREE dry erase board I wasn’t using in my office
FREE magazine cutouts to decorate mail buckets
FREE velcro tape fasteners from our office supplies
FREE mason jar from the basement
$2.21 three white hooks to hang mail buckets from Ace Hardware
$3 set of six dry erase pens from Staples
$10.53 three double hooks from Home Depot
$21 three metal mail buckets from Michaels
$36.74 total spent on awesome mail organizer!
You could eliminate the $21 I spent on mail buckets by making them from scrap wood or re-purposing other containers you have on hand. If you have extra hooks, that would lower costs as well!


I love it! I need something like this!
@Betty Baez You should totally make one! It really was very easy, only took a few hours of my time. I started it Saturday and finished it Tuesday! And I have a young child – so you know I don’t have a lot of extra time. Do you have any of the items on hand? That helped me get going. Soooo, are you going to make one?!!